9610 Commonwealth Ave., Jacksonville, FL 32220
Biscuit
BOAT:
Biscuit, a 1974 Cape Dory Typhoon
Project Detail:
Timeline:
Mid-October through TBD
Project Scope: Bottom job (stripped, barrier coat, and new antifoul), hull and deck paint, structural repairs, new brightwork fabrication, assembly and varnishing, mast and boom paint, new deck hardware, more tbd.

Project Hours:
Etching & Priming the Mast Pt 2 (6-2-25)
Jun 2, 2025
Wanting to seal off the freshly exposed aluminum to prevent further oxidation, I headed to the shop in the afternoon to flip the mast and chemically etch the surface. Upon arrival, I taped off the length of the forward portion of the mast - a length of tape that would create a drip line and prevent the etching chemical to run down the freshly primed surface. The aft portion of the mast had a channel for the mainsail, offering a natural break, or seam, to interrupt the etching chemical. The primed surface should have no issue with the etching chemical, I just wanted to limit exposure. Next, I poured some of the etching chemical and grabbed a maroon scouting pad. As I had done in the last work session, I firmly scoured the freshly sanded side of the mast to remove any recently formed oxidation. I allowed the chemical to sit on the surface for a few minutes before rinsing thoroughly with fresh water - I purchased two 1-gallon jugs of spring water for each side of the mast.
I headed into the shop and mixed a small pot of the 2-part aluminum primer paint, made especially for aluminum surfaces by TotalBoat. While the paint was inducting, I made my way back to the mast with clean rags and solvent to both dry and remove any contaminates from its surface prior to priming. After drying and cleaning the mast, and a bottle of water, I was ready to begin painting the primer onto the surface. As I did in the prior work session, I started at the base and worked my way to the mast head, painting into the priming immediately applied. The process offered a consistent and smooth surface.
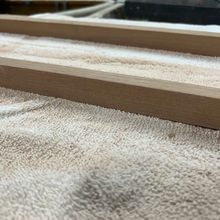
When I finished up the first coat, I headed into the shop to work on the recently scarfed toe rails. I grabbed a sander and 150-grit paper, set up the toe rails on saw horses with a couple out-feed supports to capture and support the ends, and worked off the epoxy squeeze out which was the result of clamping the two long lengths of scarfed toe rail together. I cleaned up the surfaces of both rails and set them to the side. I like to route a recess to the underside of the toe rails to allow for bedding compound to both help adhere the rail but also to create a water-tight surface. I spent the remaining time between the coats of primer to dial in the router bit and guide settings on the router. Routing this recess would come another day.
At this time, I headed back out to the mast to repeat the priming process for the second coat. This would wrap up priming the mast. After a light sand to both sides, I will determine the need for a third coat - most likely.
Total Hrs: 2.75


