9610 Commonwealth Ave., Jacksonville, FL 32220
Biscuit
BOAT:
Biscuit, a 1974 Cape Dory Typhoon
Project Detail:
Timeline:
Mid-October through TBD
Project Scope: Bottom job (stripped, barrier coat, and new antifoul), hull and deck paint, structural repairs, new brightwork fabrication, assembly and varnishing, mast and boom paint, new deck hardware, more tbd.

Project Hours:
Various Trim & Washboards (5-10-25)
May 10, 2025
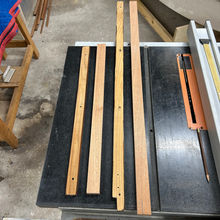
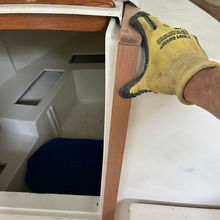
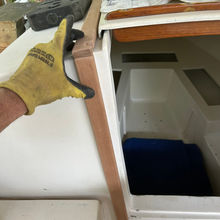
A day of brightwork fabrication, from cockpit seat trim to companionway trim and washboards...I began by selecting the original starboard companionway trim with the new mahogany reserved for these two pieces. The fresh mahogany was approximately seven feet in length, so I measured out the length of the piece of trim mounted to the deck and used to secure the companionway slide hatch. After transferring the length of the mahogany, I removed it with the miter saw. I repeated this effort for the vertical trim piece used to secure the washboards (also known as drop boards or companionway hatch boards). I notched the aft end of the deck piece - this notch allows the wash boards to slide into position in the rabbit of the companionway bulkhead. Next, I rounded the edges with a small 1/4" round over bit in my palm router. With sandpaper, I blended all the freshly cut surfaces, took the components to the boat, and set them in place to check for fit. Happy with the fit thus far, I repeated the effort for the port companionway trim. I set the companionway trim pieces to the side, awaiting dry-fitting and then varnish work.
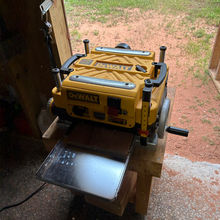
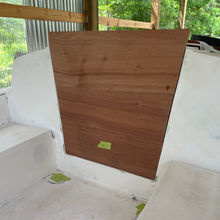
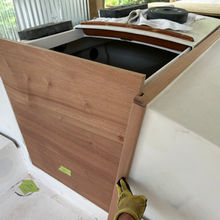
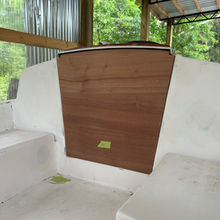
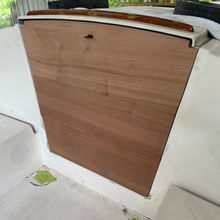
Naturally, with the companionway trim completed, I turned next to the washboards. I had set aside a couple nice lengths of the 5/4 mahogany for two of the washboards - three in total - and so I cut a length off one of the longer boards for the third washboard. The original boards were a shade under 5/8", so I opted to plane the new mahogany material to just a shade over 5/8". The slightly thicker board would add a bit more heft to them. I made several passes on the Dewalt DW735 13" planer to take the three boards to their final thickness. Started with the lower board, I compared fit of the original board to the companionway and took measurements of the width of the companionway. Transferring these measurements and dimensions to the new material, I then used the table saw and a jigsaw to rough out the new board. After setting the new rough-cut board in place, I immediately saw the areas that required some sanding attention. A few trips back and forth from shop to boat to shop, I achieved a good fit. Happy with the fit, I took the lower board to the shop to router the sides only (1/4" round over bit). Moving onto the middle board, I repeated the same steps as outlined above to include rounding over the sides of the board with the palm router. At this point I deviated a bit from the process applied to the prior two boards, opting to created a cardboard template for the upper washboard. I set the lower and middle board into position and set a rectangular length of cardboard on top of the middle board. With a utility knife and a compass, I transferred the companionway profile to the cardboard and trimmed to fit. This iterative process resulted in a great template to which I applied to the mahogany board. I removed the new upper washboard, carried it along with the other boards to Biscuit for a test fit. I set the three boards in place, stacking them on top of one another and then set the starboard companionway deck piece in place - the components fit nicely with one another. Back in the shop, I cut the edge angle on the surfaces where each of the wash boards mate. This angled seam naturally sheds water out of the boat and down into the cockpit.
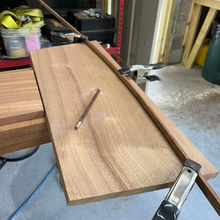
My next task was to trim the upper wash board (it was running higher than final dimension at this point), and trim in such a manner that it would just tuck under the companionway slide hatch. I went below on Biscuit, stacked the washboards in place, slid the companionway slide hatch to a point where it was nesting against the upper washboard, and then transferred onto the washboard important spatial alignment points between it and the slide hatch. Back in the shop I bent a batten into a fair curve, covering the marks I had made on the upper washboards, clamped the batten secure and then marked a cut line. With a jigsaw, I cut the fair curve and set the rough looking upper washboard in position on Biscuit. Using that iterative shaping process again, I worked my way to a good fit. I then routed the edges of the upper washboard, as well as the top edge. By hand, I just softened the other edges of all three boards. Finally, I marked for and cut the aperture for the slide hatch tang.
The last couple of trim pieces to complete today would be the cockpit seat trim lengths. These boards run nearly the length of the cockpit seating and help to capture cockpit seat cushions, preventing them from sliding off on a tack. I used the original lengths of trim for patterns, essentially replicating the dimensions, and applied some softening to the ends by sanding in a larger radius. All the brightwork was wiped down and set onto blankets to protect them until such time that I can apply varnish,
Total Hrs: 8
