
9610 Commonwealth Ave., Jacksonville, FL 32220
Somerledi
About Her: Somerledi is an '84 Shannon 28
Project Scope: Work on Somerledi is to include a complete bottom job, with blister repairs, seacock removal and replacement, and additional items as needed by her owner.
Timeline: March 2026 through TBD
Project Hours:
Cont. Stbd Blister Repairs & Seacock Removal (4 of 7)
June 6, 2026
Saturday, upon arrival, I started with my usual water-wash to remove amine blush from the fairing work done in the previous work session. The intent was to sand the worked areas fair to the hull and then apply the first barrier coat to the balance of the starboard hull. So, to that end, I began sanding with 5" 60 and 80-grit disks. It became apparent that the repair areas where I had laid 1708 biaxial cloth, and a first skim coat of fairing compound, would need a final fairing coat. In addition, I noticed and began marking for additional grinding work on small blisters. The far majority of the blisters across Somerledi's hull are shallow and essentially cosmetic in nature. I treat the work as if she's my boat, and my approach is to repair what is presented, within reason. These small, one laminate layer deep blisters require a touch of the grinder to dish it down to clean glass, and then fill to fair. All that to say, the barrier coating on the final third of Somerledi's starboard hull would wait for the next work session. After completing the sanding work, I cleaned the hull with a good water rinse, allowed it to dry in the heat of Florida's sun, and then wiped them clean with acetone. I mixed up West System epoxy, thickened it, and then applied to these additional work areas. I skimmed the prior work requiring a final touch with West System thickened with 410 micro-light. With the hull work brought to a natural stopping point, I made my way into Somerledi's cabin to begin work on removal of the seacocks.
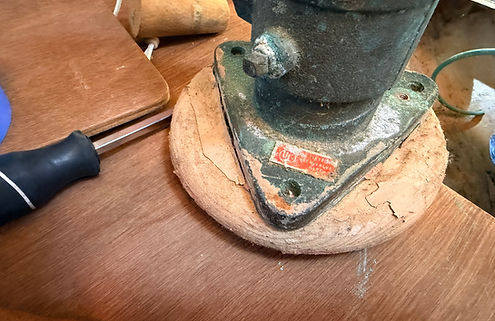
My first seacock targeted was the head discharge. a 2" hose was attached to this port side seacock, mounted roughly amidships. I removed the grounding wire and loosened the two hose clamps securing it to the 90-degree elbow. I noticed as I was prying the hose free that I was getting play in the seacock base itself. Upon further inspection, I saw no bolts securing the seacock base flange to either hull or baseplate. With the hose free, I began to tap the seacock with a hammer, as well as rocking it back-and-forth. The seacock finally yielded and I removed it and what was left of the thru-hull fitting from the hull. Turns out, the seacock was only secure to the baseplate thru a compression fit with the thru-hull. I imagine a bedding compound was used to secure the seacock to its baseplate, but have yet to confirm this. The installation was "light duty" in my opinion and highly susceptible to catastrophic failure. The new seacocks to be installed with correct this potential nightmare.
With the head discharge seacock removed, I turned my attention to the galley - located to starboard. There are two smaller 3/4" seacocks mounted here, and mounted in the same flimsy manner. I removed the grounding wires and hoses, and then pried the seacocks free from their questionable install. These two seacocks served the galley sink and the icebox, connected by a y-valve. After these two galley seacocks, I headed forward to remove the head intake seacock, located amidships to starboard and also 3/4" in size. A small locker access plate located on the aft side of the bulkhead separating the head from the cabin gave entry for removal. Thus far, all seacocks show the same installation practice, so aside from the limited access room the seacocks were freed without too much fuss.
I ran out of time for the day, but managed to get the aft third of the starboard hull (no pics) ready for barrier paint, and also removed 4 of 7 seacocks.
Total Hrs: 6


