9610 Commonwealth Ave., Jacksonville, FL 32220
10) CD 27 - Backing Plates for the Future
February 10, 2024
The G-10 backing plates for the port and starboard standing rigging (shrouds and sidestays) had been prepared earlier, so with the "tie" layer (1 layer) of 1708 biaxial cloth on, the plates were ready to be glued in. The backstay backing plate, located in the aft underside of the lazarette locker would also be installed, but required some shaping priorate installation. There was no sanding needed since I applied a layer of peel ply to the "tie" layer of fiberglass, so I simply wiped down the surfaces of the backing plates and the underside of the hull-deck flange. Prior to this prepping process, I did measure and cut supports to wedge the backing plates into position while the thickened epoxy cured. For the head and hanging locker, I used partially deflated small fenders as a base since this area presented significant voids due to the interior fiberglass liner. Let's glass in some backing plates!
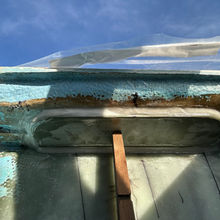
I applied neat epoxy to the underside of the hull-deck flange as well as the surface of the back plates. Next, I mixed additional epoxy and thickened it with West System 404 high-density filler. The thickened epoxy was applied to the underside of the hull-deck flange fairly thickly - enough to fill shallow voids and provide good surface contact. First the port side, then the starboard side, the plates were up and support bracing was placed to secure while the epoxy cured.
With the port and starboard plates in, I moved out to the cockpit to begin installation of the backstay backing plate. The plate itself, a length of 4"-wide G-10, required some shaping prior to its installation. So placing the plate in situ, I transferred the interior stern surfaces to the plate to begin the shaping process. This was an iterative process with an angle grinder and 40-grit flap wheel, but managed to shape the plate to fit nicely. Surfaces were cleaned with acetone, wet out with neat epoxy, and then set in place with epoxy thickened with 404 high-density filler. That would wrap the day.
Total Hrs: 4


